What You’ll Need
Warning: Safety first!Always be careful when using hot glue and sharp objects (like a utility knife). Keep your workspace clean and orderly to prevent accidents. Observe proper handling.
Step 1: Measure Your Phone’s Thickness
Using a ruler, measure the thickness of the phone for which you’ll be creating this DIY mobile gaming trigger button. Record the measurement and add a 1/4-inch (6mm) allowance.
Step 2: Prepare the Building Blocks
Take9 popsicle sticksand set aside 3 for Part A, 3 for Part B, and 3 for Part C. Mark each popsicle stick according to its Part in the picture above [Figure A]. These three wooden pieces will become the body of your DIY mobile gaming trigger button.
Use your utility knife to carefully carve each popsicle stick into the shape of its Part in the picture. Then, glue the three for Part A into one (essentially making it thicker). Repeat for Parts B and C.
Step 3: Assemble the Building Blocks
Using the above picture [Figure B] as a guide, position the different Parts according to the layout on the left. Push them all together and the result should look like the layout on the right.
If all the Parts fit well, use super glue or wood glue to adhere it all together. If you need to make adjustments, do so before using any super glue or wood glue.
Step 4: Prepare the Trigger Wire
Prepare your copper wire (or tie wire) by bending and twisting it according to how we’ve shown in Figure C. I’ve used a thin spring wire, which I had to twist to make it thick enough to hold its form—if your wire is sturdy enough on its own, there’s no need to twist it.
Step 5: Assemble the Body and Wire
First, drill a hole through the body where Parts A and C connect. Insert the wire through a piece of plastic tubing (roughly 3mm in length) before inserting it in the hole. The plastic will act as a stopper so that the trigger head won’t hit Part B when pressed.
If you can’t drill a hole for whatever reason, you can always create a makeshift hole by gluing stray popsicle stick pieces. See Figure D for an example of this.
Bend the other end of the wire as shown in Figure D. This will be the actual button. (The left trigger should have its trigger head on the right and the right trigger should have its trigger head on the left.)
Step 6: Assemble the Spring
Cut a PVC board—or any PVC card, like an old ID card—to the same length as Part A and glue it below the body. Then cut the ballpoint pen spring to a height of 1/2 inch (12mm) and place it below the button.
Step 7: Assemble the Trigger Head
To create a trigger head that can activate your phone’s screen, you’ll need to use a conductive cup. I used one from a cheap stylus pen that I was willing to disassemble. Don’t have one? You can use aluminum foil.
Cut a 1/4-inch (6mm) piece of hot glue stick and carve it to make a piece that has 1/5-inch (5mm) height and width.
Insert the end of the wire into the glue stick [Figure E] and either cover it with the conductive cup [Figure F] or wrap it in aluminum foil [Figure G]. Make the tip rounded or curved. You can heat the foil to smoothen it out, but make sure it doesn’t get hot enough to melt the glue.
Step 8: Final Adjustments
Place your DIY mobile gaming trigger on your phone. Measure the gap between the screen and Part B. Cut a piece of glue stick equal to the gap and adhere it to Part B. [Figures E, F, or G]
Press the trigger button and check if it hits the screen. Make any necessary adjustments by bending the wire, so that it hits the screen and springs back when unpressed.
More Mobile Gaming Accessories
There you have it! Repeat everything to create a second mobile trigger button, making sure to reverse the wire for the other side.
Next, hop into your game of choice and change your settings to work with the button. Look for the Control options and adjust the positions of the Fire and Scope buttons by dragging them on screen to where the trigger heads will be.
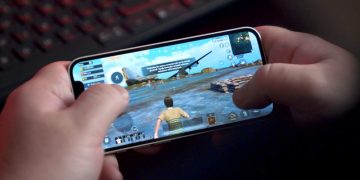
You can now shoot and scope without blocking your phone screen with your fingers! If you found this helpful, you’ll probably want to check out a few other mobile gaming phone accessories as well:
Read next:Must-have mobile gaming phone accessories
![]()
![]()
![]()

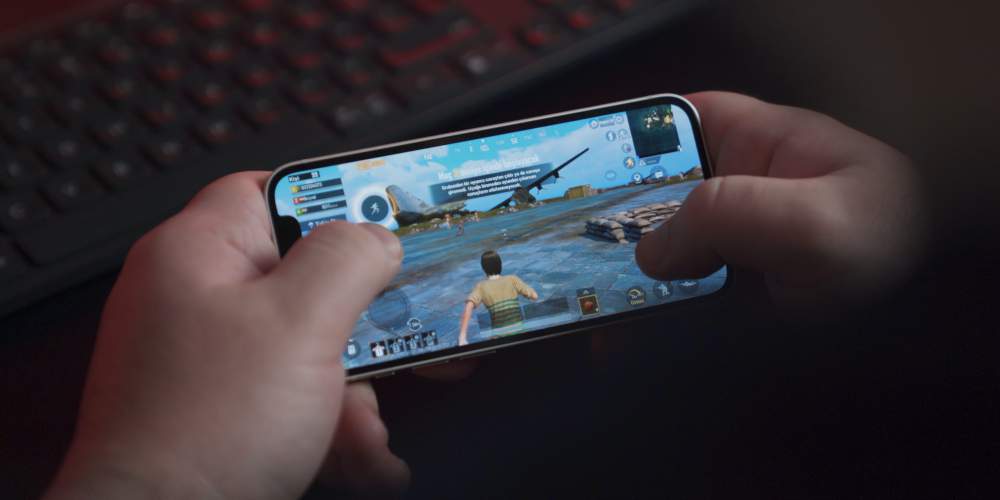

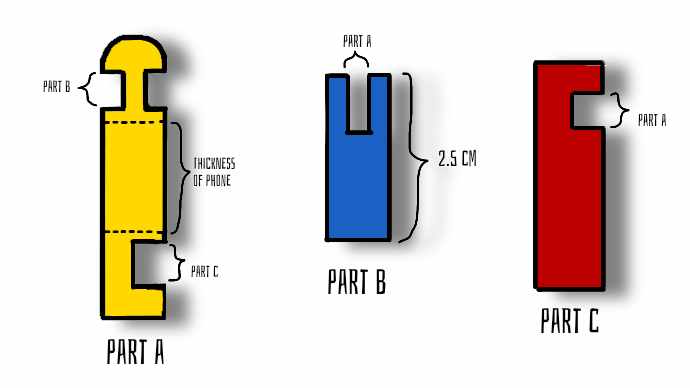
Figure A
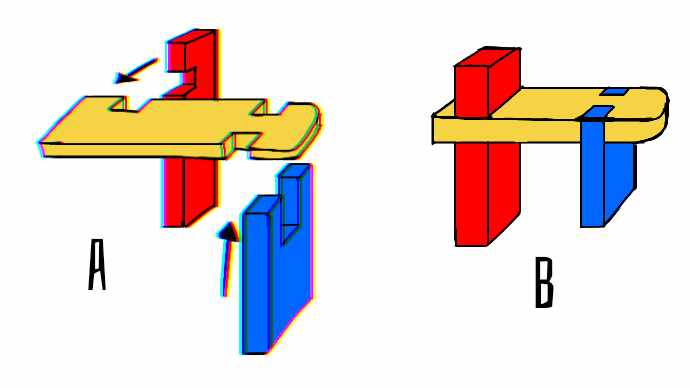
Figure B
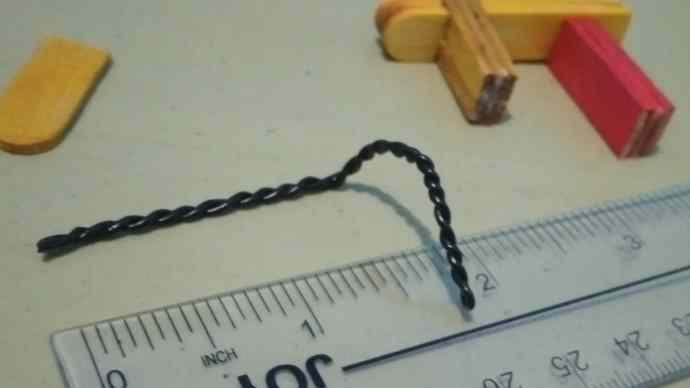
Figure C
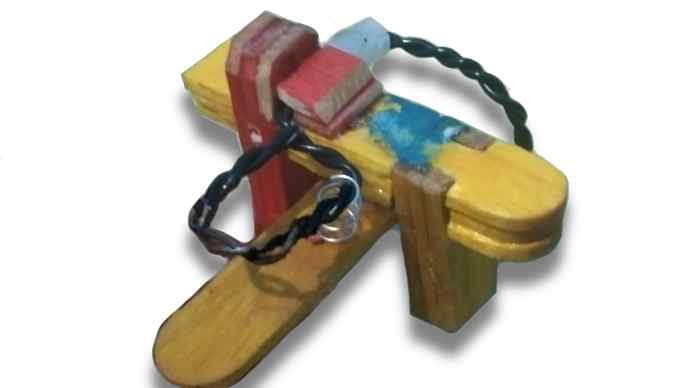
Figure D (the hole above is for reference only)
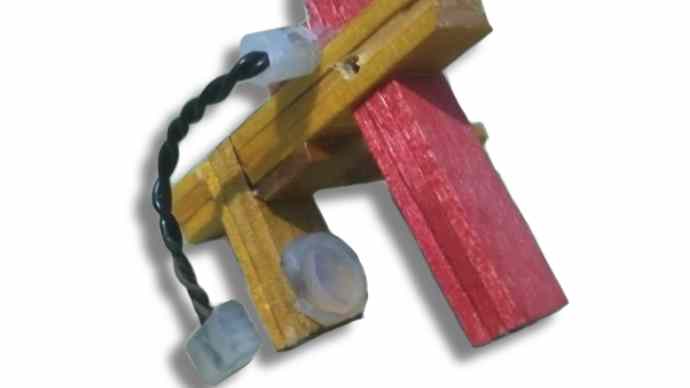
Figure E
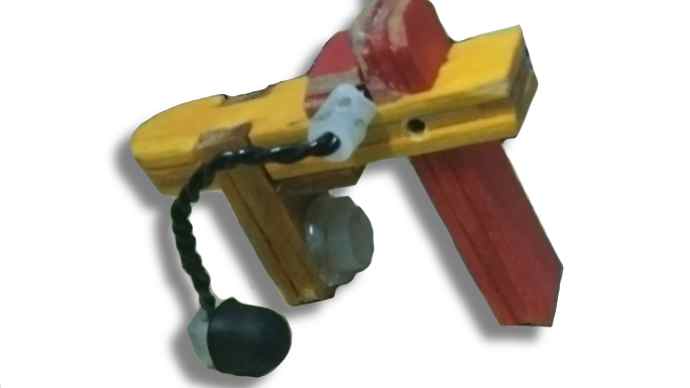
Figure F
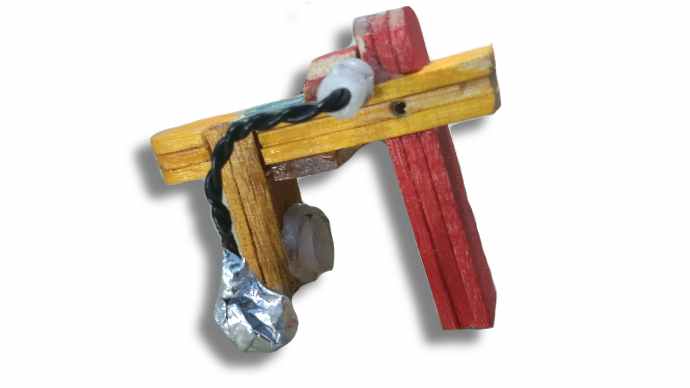
Figure G


![]()
